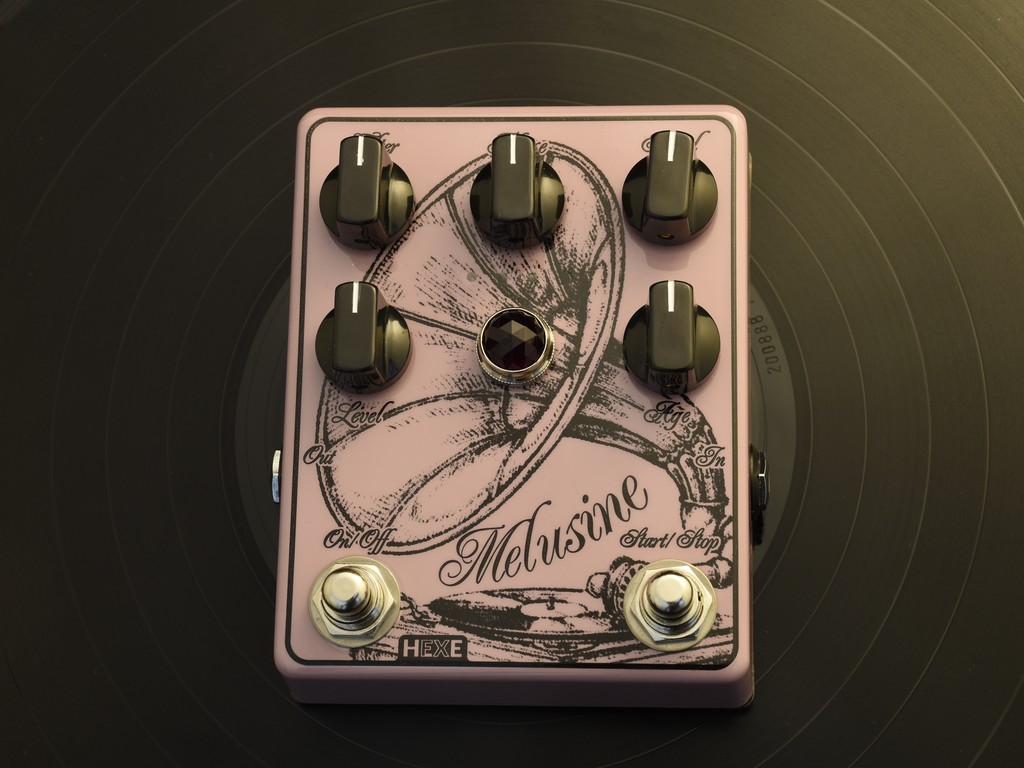
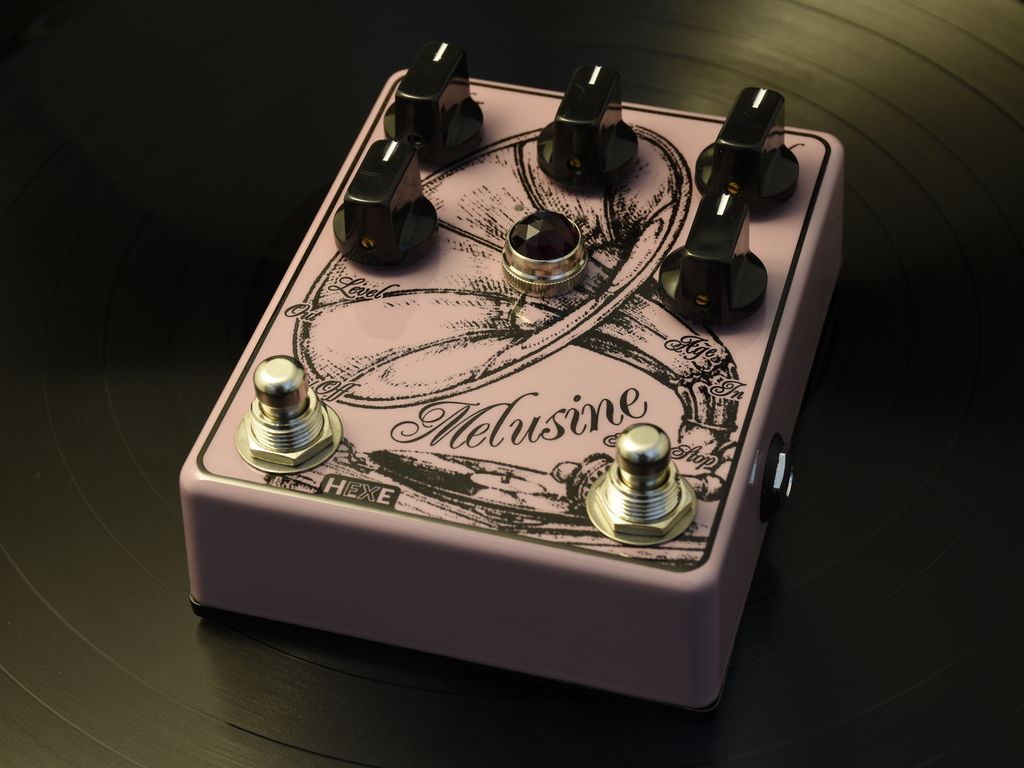
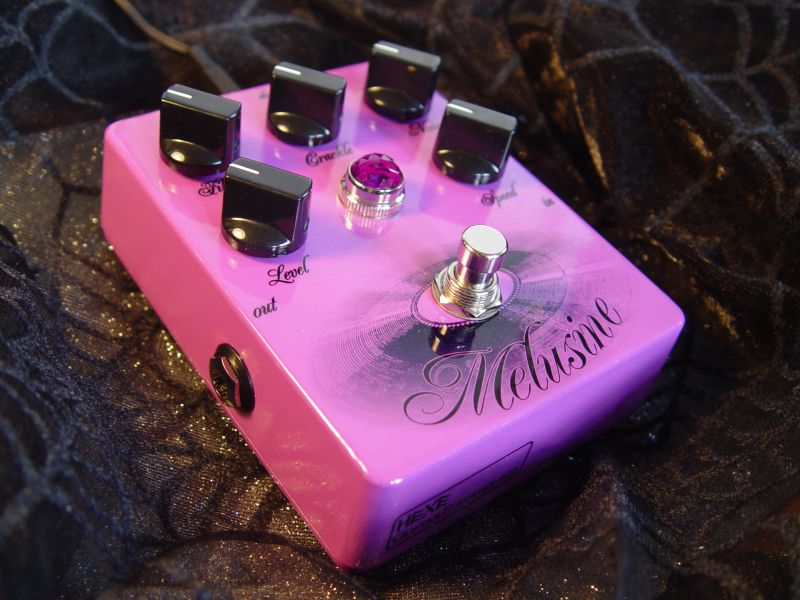
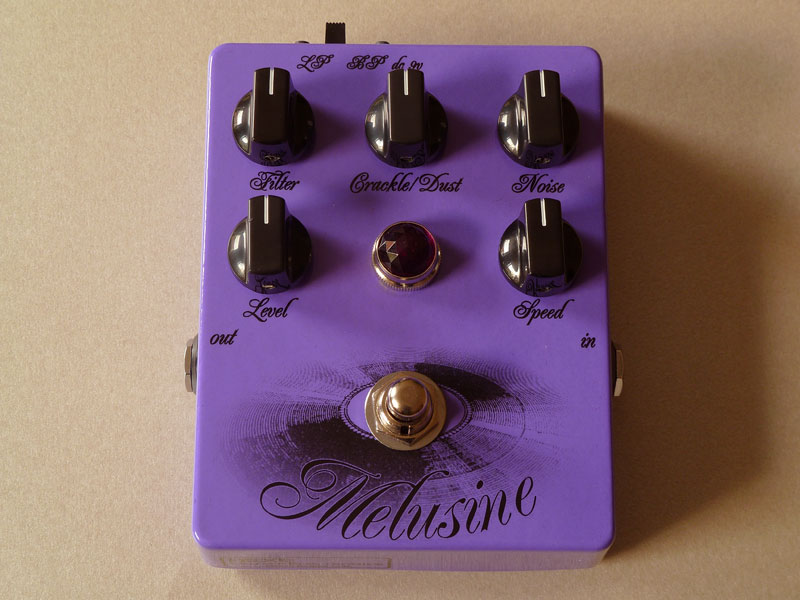
Stereo vinyl/phonograph emulator. Model IV.
An arsenal of Lo-Fi tools to recreate many sounds of the vinyl era,
from slightly lesser quality record players to worn out broken mechanical phonographs. Works as vibrato, filter, distortion or a pure vinyl noise generator, too.
Successor to Melusine III Guitar Phonograph pedal.

Melusine IV, a successor to Melusine III, the next generation vinyl/phonograph emulating device combines a few tools and effects to process the incoming mono or stereo signal and give it a wide range of retro Lo-Fi sounds.
Gentle vibrato with special randomised waveform, versatile high pass or band pass filter, a crossover distortion emulating broken electronics and a complex multi layer fully live generated noise, crackle, thump, scratch mixture - all these tools are available to make the audio material go on the time travel to the past. Long before humanity invented more compact digital ways to degrade the signal (a future version of Melusine might turn into a 128kbit mp3 emulator, who knows...).
To ensure the Melusine will degrade the signal only when asked to, it is equipped with a reliable relay based stereo true bypass. No active components in the path.
Placement:
The most effective way to use Melusine is to place it at the end of the complete signal chain. Not always possible with classic guitar setups, but ideally the best place would be even after the speaker simulation part, if used. This way the filtering will alter the final signal and the extra layers of noises will not be affected by the guitar speaker response. However, experimenting with different setups is not discouraged and might lead to interesting new results.
Example 1. Classic guitar mono setup with pedals in front of an amp:
- Place the Melusine as the last effect in chain, just before the amplifier's input.
Example 2. Classic guitar mono setup with pedals in front of an amp and an effect loop:
- Place the Melusine as the last effect in the FX loop, just before the Loop Return.
- In case if using a "dummy speaker" as load for direct recording - process the line level signal coming out from the load box.
Never plug the pedal directly to the speaker output!
Example 3. Using guitar amp modellers or external speaker emulators like IR loaders etc.:
- Place the Melusine after the speaker emulator, ideally using stereo output.
Start/Stop effects:
The needle scratch/drop sound effects know from the Melusine III has been expended to 5 in total:
- Needle scratch. Hold down the Start/Stop footswitch while the effect is ON. Ends in Mute state (no audio passthrough).
- Needle drop. Hold down the Start/Stop footswitch while the effect is OFF or in Mute state. Ends in Effect On state (normal operation).
- Needle skip, repeating the last ~800ms of audio material. Simulates needle jumping between two tracks. Double press the Start/Stop footswitch to enable/disable that effect.
- Slow down. Short press the Start/Stop footswitch while the effect is ON. Ends in Mute state (no audio passthrough).
- Slow start/Speed up. Short press the Start/Stop footswitch while the effect is OFF or in Mute state. Ends in Effect On state (normal operation).
The main LED shows the current status when using the Start/Stop effects:
- Needle Skip - slow flashing.
- Mute state - after Needle Scratch or Slow Down - fast flashing.
Using presets:
Melusine IV can store 4 presets of favourite sounds. The presets are also used to ensure the pedal always starts up with the same settings, being the last used preset. Pieces of sticky tape securing the knobs in one position during the transport are no longer necessary.
Changing the preset:
- Hold down the On/Off footswitch, pedal will enter a preset-change mode indicated by a blinking preset led.
- A steady lit led shows the current preset, keep pressing the On/Off footswitch to browse for a new preset, indicated by a blinking led.
- Once a new preset is chosen, press and hold On/Off to activate it.
Editing the preset:
- Switch to the preset that is going to be altered.
- Press and hold the On/Off footswitch immediately followed by Start/Stop. Release the footswitches.
- Preset Edit mode is indicated by pulsing main LED
- Set new sound using the knobs.
- Press Start/Stop to store the settings, indicated by a few quick main LED pulses.
- Repeat step 2 to exit the Preset edit mode.

Auto ON mode:
This is a special mode included for situations when the pedal is used with externally controlled bypass loopers. To avoid the need to turn on the pedal every time the power is applied it can be set to do it automatically. When enabled, Auto ON will make the pedal start in ON state on every power up.
Toggling the Auto ON feature
- Power off the pedal.
- Hold down the Start/Stop footswitch and apply the power.
- Auto ON will be enabled/disabled, depending on the previous state. Status will be shown on the preset LED bar.
Setting the input gain:
It might be necessary to adjust the input gain of the pedal to match the output level of the instrument. An example would be a guitar with a very low output pickups resulting in limited distortion range (gate cutting off too early). On the other hand, too hot pickups will result in signal clipping.
The rule of thumb for an optimal gain value is to set it in a way the signal will be around unity gain when the Level knob is at maximum.
To change the input gain do the following steps:
- Power off the pedal.
- Hold down the On/Off footswitch and apply the power.
- Pedal will boot up in the Input-Gain setup mode, the main LED will blink in two short blinks pattern.
- Preset LEDs will show the current setting. The default one is 1 (1 led are on).
- Use the Start/Stop footswtich to increase the input gain or press On/Off to decrease it.
- Once done, press and hold down On/Off, then press and hold down Start/Stop. Pedal will store the new setting and resume normal operation.

Factory reset:
Factory reset will restore the listed parameters to default ones:
- Default settings for all 4 presets.
- Input gain setting.
- Auto ON mode disabled.
Performing the factory reset:
- Power off the pedal.
- Press and hold down both footswitches On/Off + Start/Stop.
- Apply the power to the pedal.
- Factory reset will be performed, once done the Preset leds will bounce left to right and back a few times, indicating success.
Alarm messages:
Melusine IV monitors its supply voltage and shows alarm messages when something is impacting it's correct operation.
In case a problem with the power supply is detected and the voltage drops below an acceptable level, pedal will go into bypass and start to blink all Preset LEDs 3 times. Press On/Off to reboot the pedal. If it happens again, check the power supply. It means there are voltage drops, most likely due to insufficient output current. Try a 9VDC output/adapter with a higher output current.
Controls:
AGE | SPEED | NOISE | FILTER | LEVEL | FOOTSWITCHES
AGE:
Controls the character and density of the generated vinyl noises.
Settings past 50% add distortion to the signal ontop of the noise density maxed out.
This knob operates in conjunction with the NOISE control.

SPEED:
Controls the vibrato rate.
Vibrato is switched OFF if the knob is set to zero.
NOISE:
Controls the volume of the vinyl noises layer. Used to set the proper mix balance between the noise sounds and the incoming audio signal.
Set to minimum switches off the noise layer. This way the AGE knob can be uses as distortion control only (settings over 50%).
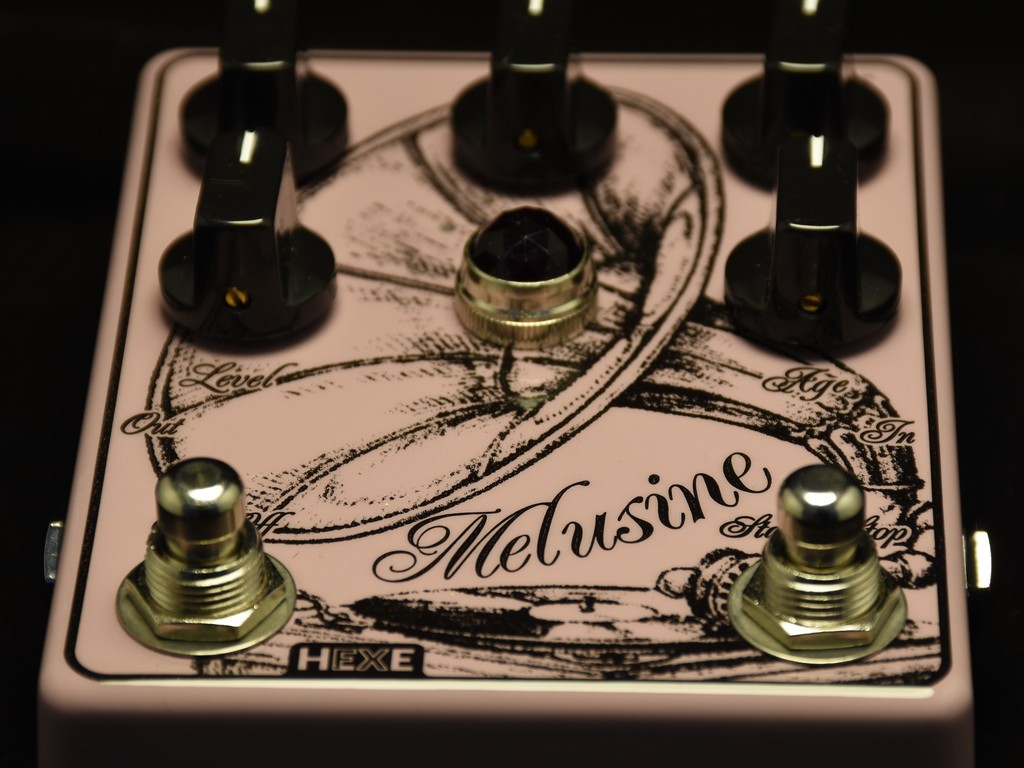
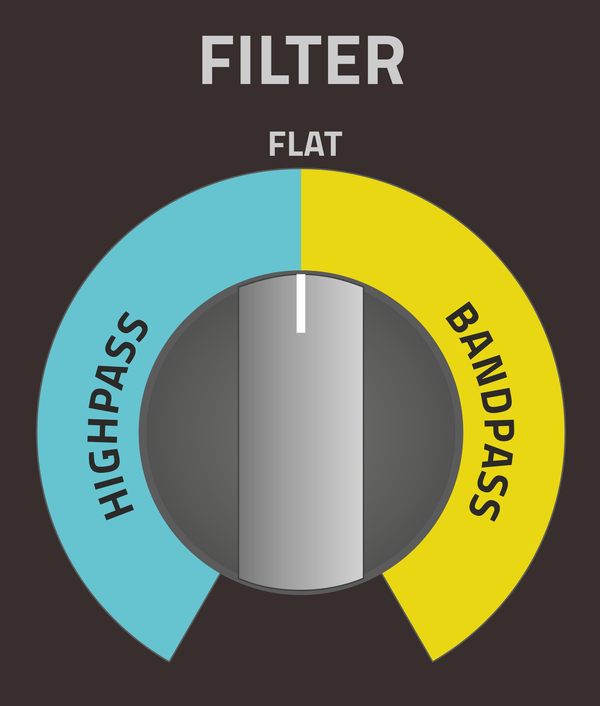
FILTER:
Output filter control, split into 3 ranges:
- Max high pass starting at minimum.
- Flat response (filter bypass) at 50% of the range.
- Band pass filter for settings over 50%.
LEVEL:
Master output volume knob.
FOOTSWITCHES:
On/Off:
- Short press: effect on/off (true bypass).
- Hold down: change preset.
Start/Stop:
- Short press: slow down, slow start effects.
- Double press: needle skip/repeat effect.
- Hold down: Needle scratch or needle drop effects.
Story:
In early 2009 i was helping my wife with a charity event in one of local retirement homes. At one moment a young man came in and brought a very old phonograph, one of those mechanically spring driven ones (pure passive analog path!). For many esteemed seniors listening to music played from a record player was like a trip back in time to their youth, they looked so happy. That was the trigger point, i knew i want to make a pedal that will mimic that type of sound.
From the beginning i realised it will be a very niche pedal, some might even call it a "one trick pony", but it wasn't going to stop me. The Melusine was born. Btw. another pedal name i have to thank my wife for :)
The basic concept and functionality of the pedal did not change much compared to the Melusine I, the prototype. The vinyl artifacts, clicks and noises are generated on the fly using random number generator driven algorithms. The prototype featured only one, bandpass type of filter, Crackles, but no scratches, no complex lfo waveforms for the modulation part. But it was a start...
...followed by an upgraded model: Melusine II. Now, in addition to Crackles having a dusty record simulator, two settings for the filter: bandpass or lowpass. At one point i even designed a custom stereo model of the Melusine II.
While changes made between model I and II were mainly upgrades only, hardware-wise Melusine III is redesigned completely from scratch resulting in a lot more convincing vinyl simulation and a few extras:
- Redesigned filter section allows to use the knob as "aging" control, from a modern HiFi sound to a very LoFi narrow band one. It makes the pedal quite useful as a filter only device.
- A lot more complex and multi layer crackle/dust sounds.
- Dual function footswitch for cool needle drop or scratch sound effects.
- Modulation waveform was made also a little bit unusual to mimic various mechanical flaws of a record player.
2021, despite the world being in 2nd year of pandemic and ongoing global chip shortage, a new model - Melusine IV takes shape.